


By Jam Walker
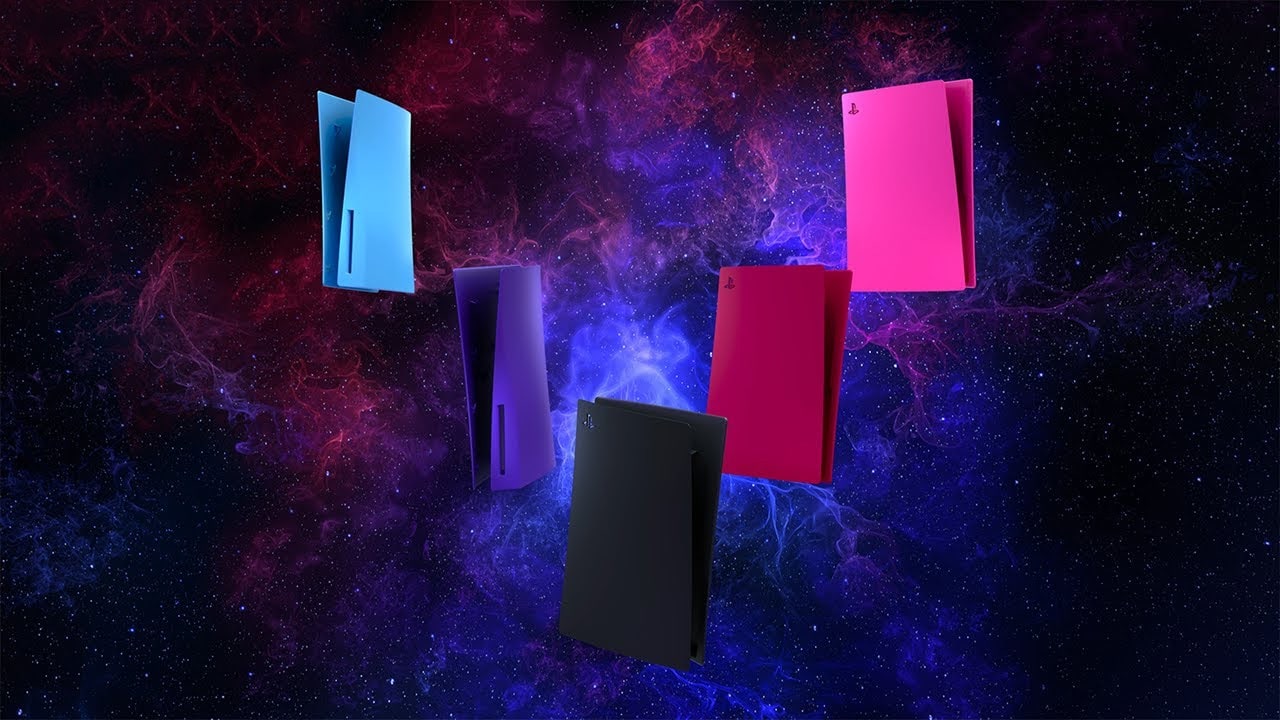
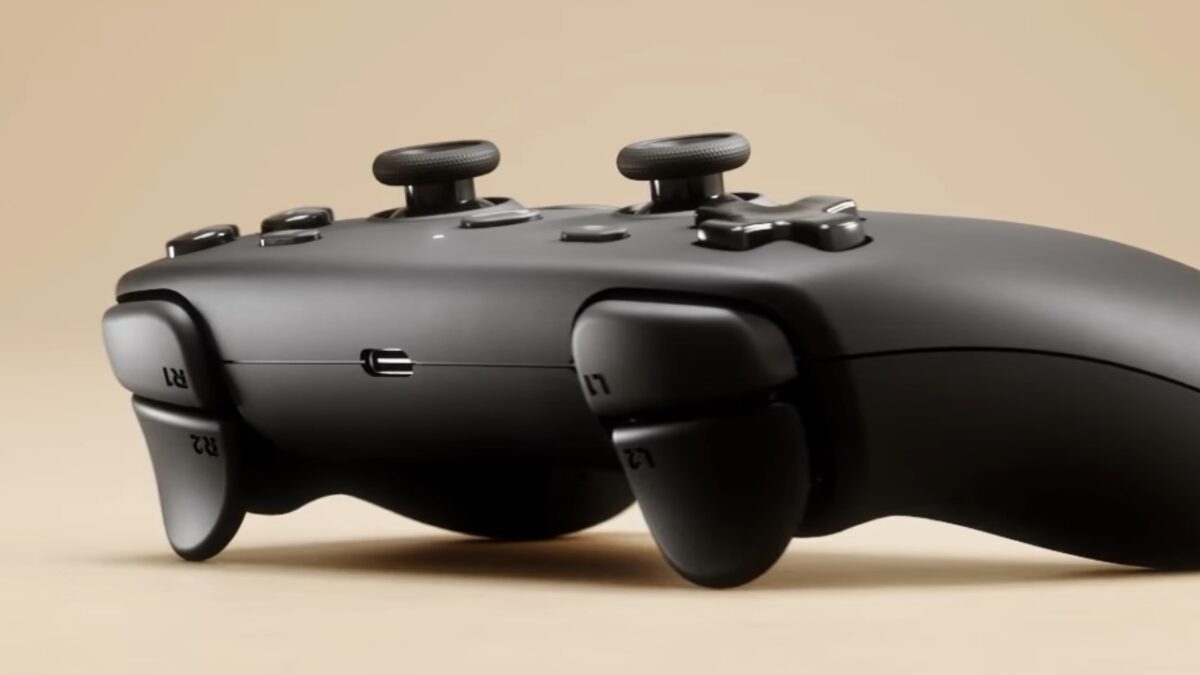
The official PlayStation PS5 faceplates recently launched around the world. But while the ease of restyling the monolith next to my TV to sport my favourite shade of purple was highly appealing, the AUD $84.95 price tag was simply too much for me to swallow – and I suspect plenty of people are in a similar boat.
But as someone who is interested in painting tabletop miniatures and has access to a variety of painting tools, I quickly started to wonder if I could use those skills to ‘Prince-ifying‘ my PS5 on my own.
Like every person with a hare-brained idea, I started Googling to see how viable it was. And just like every other time I Google something, I found so much fervently argued, entirely conflicting advice, I ended up deciding to put faith in my own painting abilities, and wing it.
Thankfully, things turned out pretty well, and the materials ended up costing around half the price of what a new set of faceplates would have. So for the courageous among you, here’s my process, my tools, and my journey.

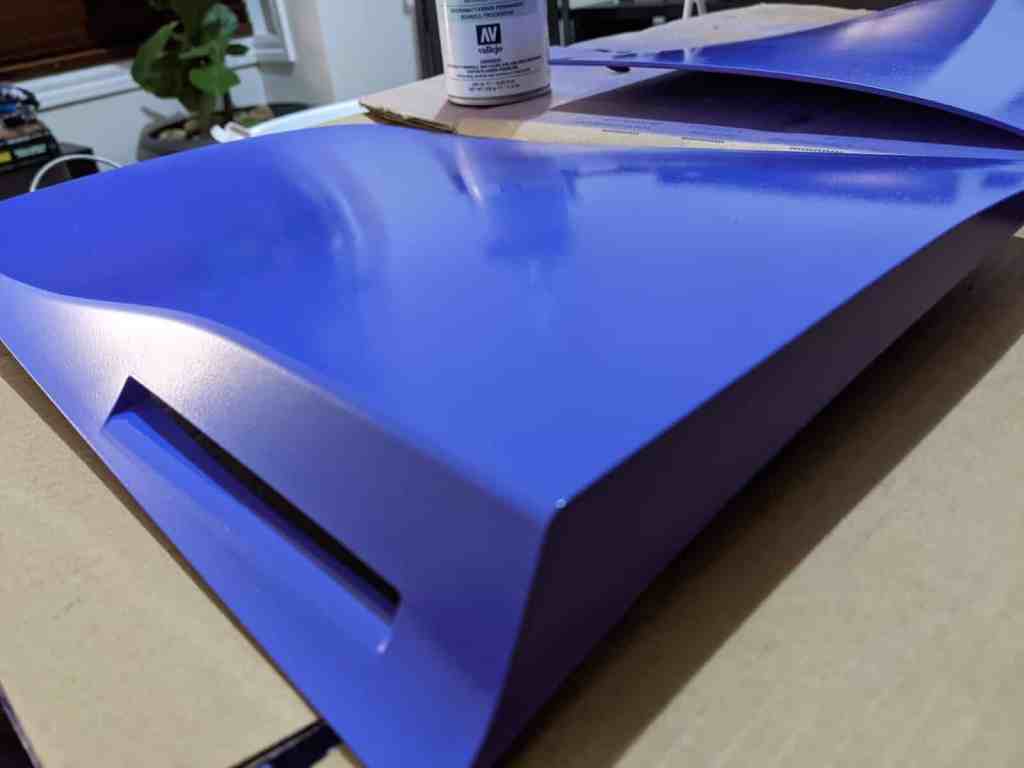
Vallejo Hobby Paint has been my go-to spray primer for miniatures for the past year, and I happened to have a barely used can of ‘Alien Purple’ kicking around that I never ended up using.
At around AU $20 a can, this stuff isn’t as cheap as spray paint you can get from a hardware store, but my familiarity and confidence with the product made the whole project feel a good deal less stressful – and I would have gone with it even if I hadn’t already had it on hand.
I knew I wanted my PS5 faceplates to have a slightly more glossy finish than the raw paint would give too, so I also picked up a can of Vallejo Acrylic Satin Varnish (also around AUD $20) to help it shine, while also protecting it from wear and tear.

I thoroughly cleaned each faceplate in hot soapy water, and dried them fully before painting. Given the ease with which the PS5 faceplates can be removed, this actually might not be a bad idea to do every once in a while if you’re leaving your system as its standard white anyway!
The generally oppressive Melbourne winter was kind to me on the weekend of the paint, as the wind remained calm and the sun was shining, giving me optimal conditions in which to spray paint outside.
I cobbled together a painting station out of one of my housemate’s outdoor benches, some cardboard boxes I embarrassingly still had after I moved in 15 months ago, swallowed my anxieties, and set to work!

I knew from experience that doing many light coats with a couple of hours in between, for each to be touch-dry, would result in a smoother and more consistent finish.
The agonisingly slow pace of this method did allow me the time to freak out that it was all going to be a complete disaster, but by the third coat I became really pleased with how it was all coming together. By the fifth, I was intensely pleased!

As the sun started to set, I realised I was running out of spray paint, and I hadn’t even started on the inside yet. Mercifully, my local hobby shop had another can of the same paint in stock and was open late on a Saturday.
One frosty detour into the chaotic Melbourne night, and one rugged-up night’s sleep later, I gave the inside of each faceplate a few coats, one last coat to the outside, and decided that it was done!
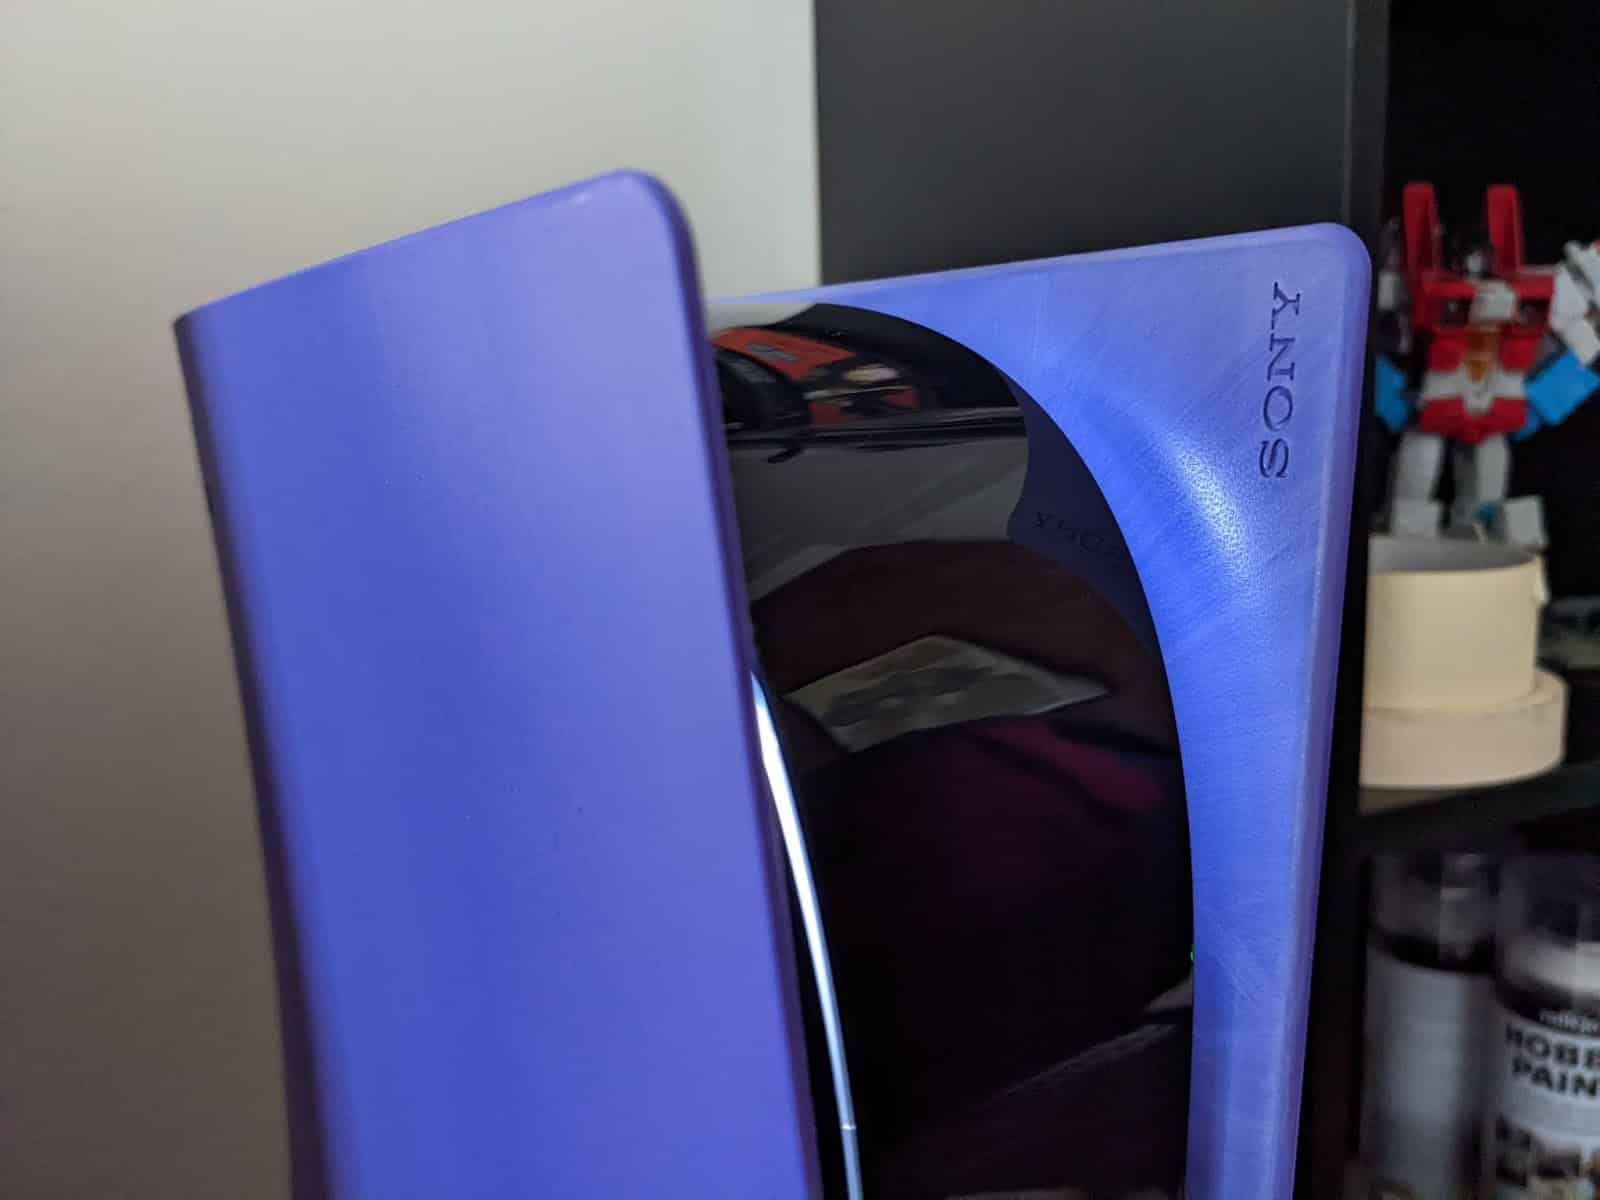
Before applying the varnish, I brought the plates inside to see how they now looked against the system itself. While I felt that the results were looking quite good, my ‘entirely unable to just let enough be enough’ brain decided it needed a little more pizzazz.
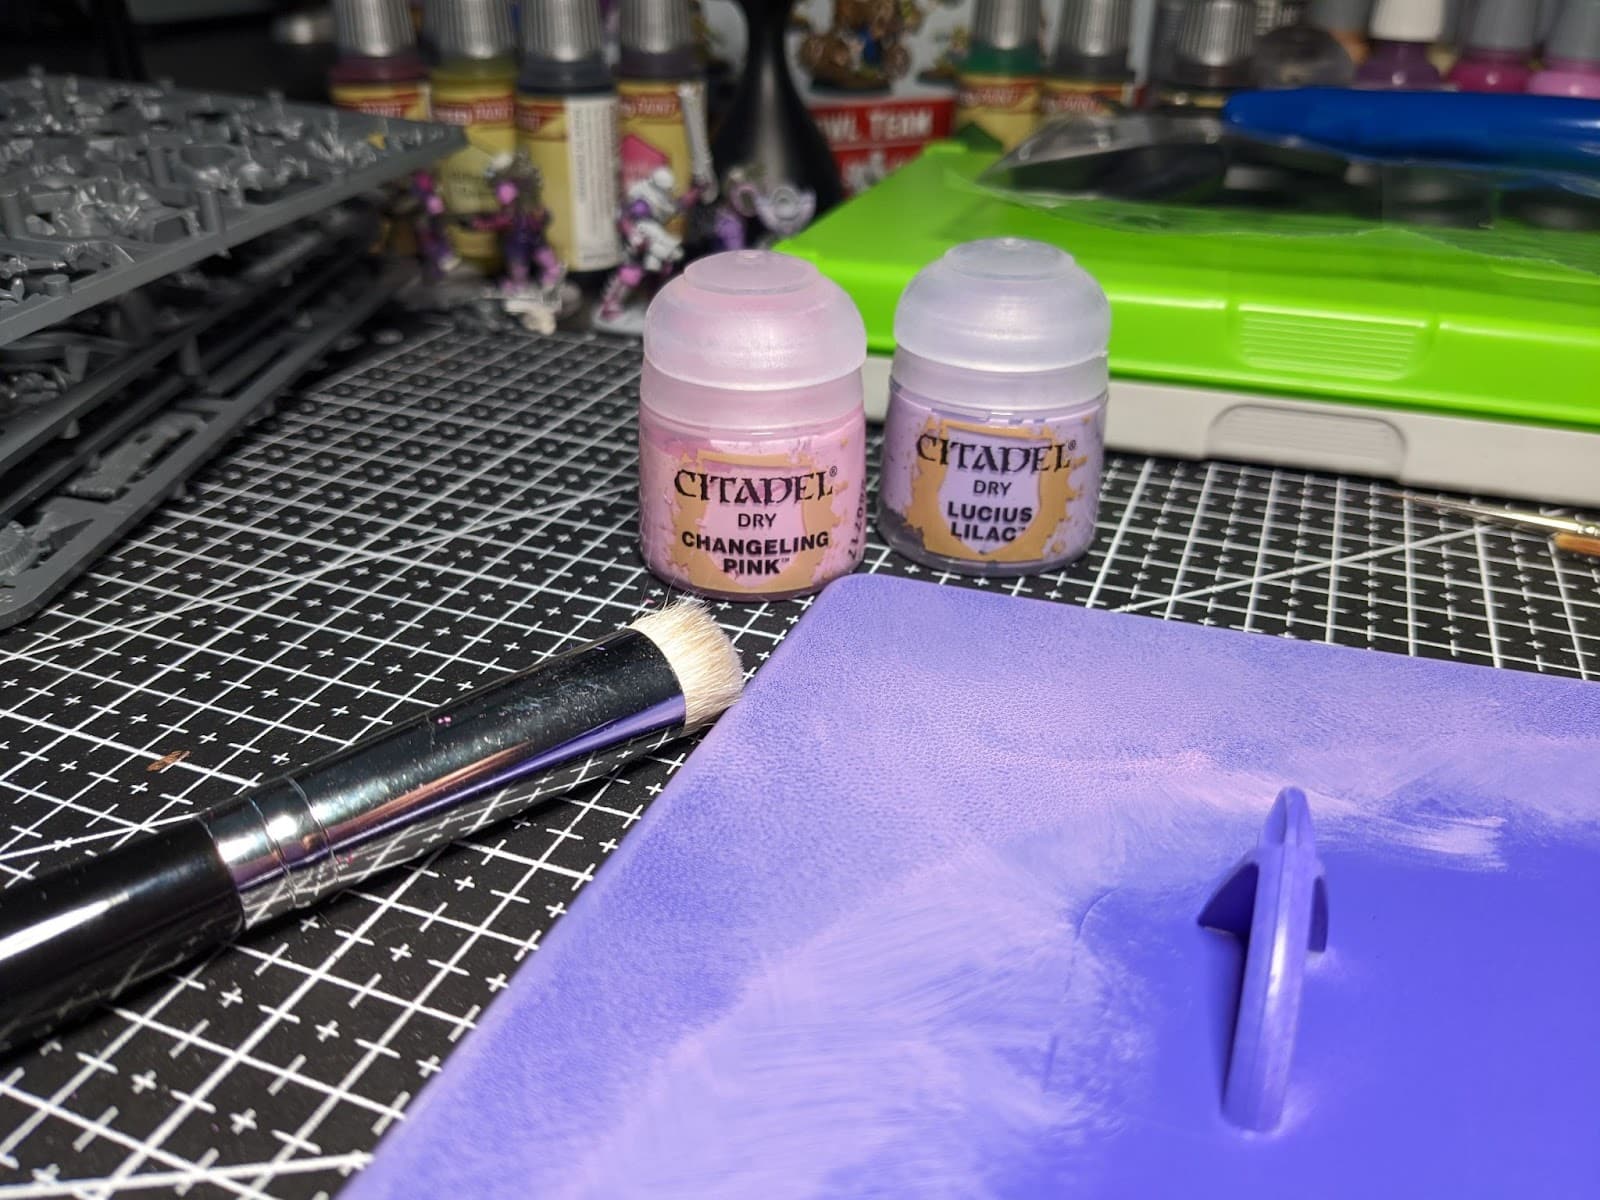
I brought the faceplates over to my miniatures paint station and applied a quick drybrush of Citadel Dry Lucius Lilac and another of Changelink Pink to the inside edges of each piece.
‘Drybrushing’ is a technique where you load up a large brush with paint, rub most of it out onto a piece of paper towel, then flick the brush lightly across the surface so that paint just catches upon the subject, hitting raised areas more strongly.
You can use any kind of paints for this, but the range of Dry paints from Citadel give effortlessly great results.
Next, I applied two coats of the satin spray varnish to each side of each piece, waiting for about one hour between the first and second coats for each side, and then 24 hours for each side to fully cure before flipping them over and spraying the other.
Satin varnish is a nice mid-point between the dullness of matte varnish and the intense shininess of gloss, but your preferences are, of course, your own.
You might not thinking that varnish-sealing the inside of each case piece matters so much, but it’s important to remember that video game systems get hot, and you really do not want to risk spray paint potentially peeling off and floating loose inside your console years from now.
Even if you choose to attempt this same kind of project using a different kind of paint, I’d strongly suggest sealing the case with proper varnish fully on each side as a final step to protect your very expensive and rare console.
Once the varnish had fully cured, I reassembled the console and beheld my completed work!

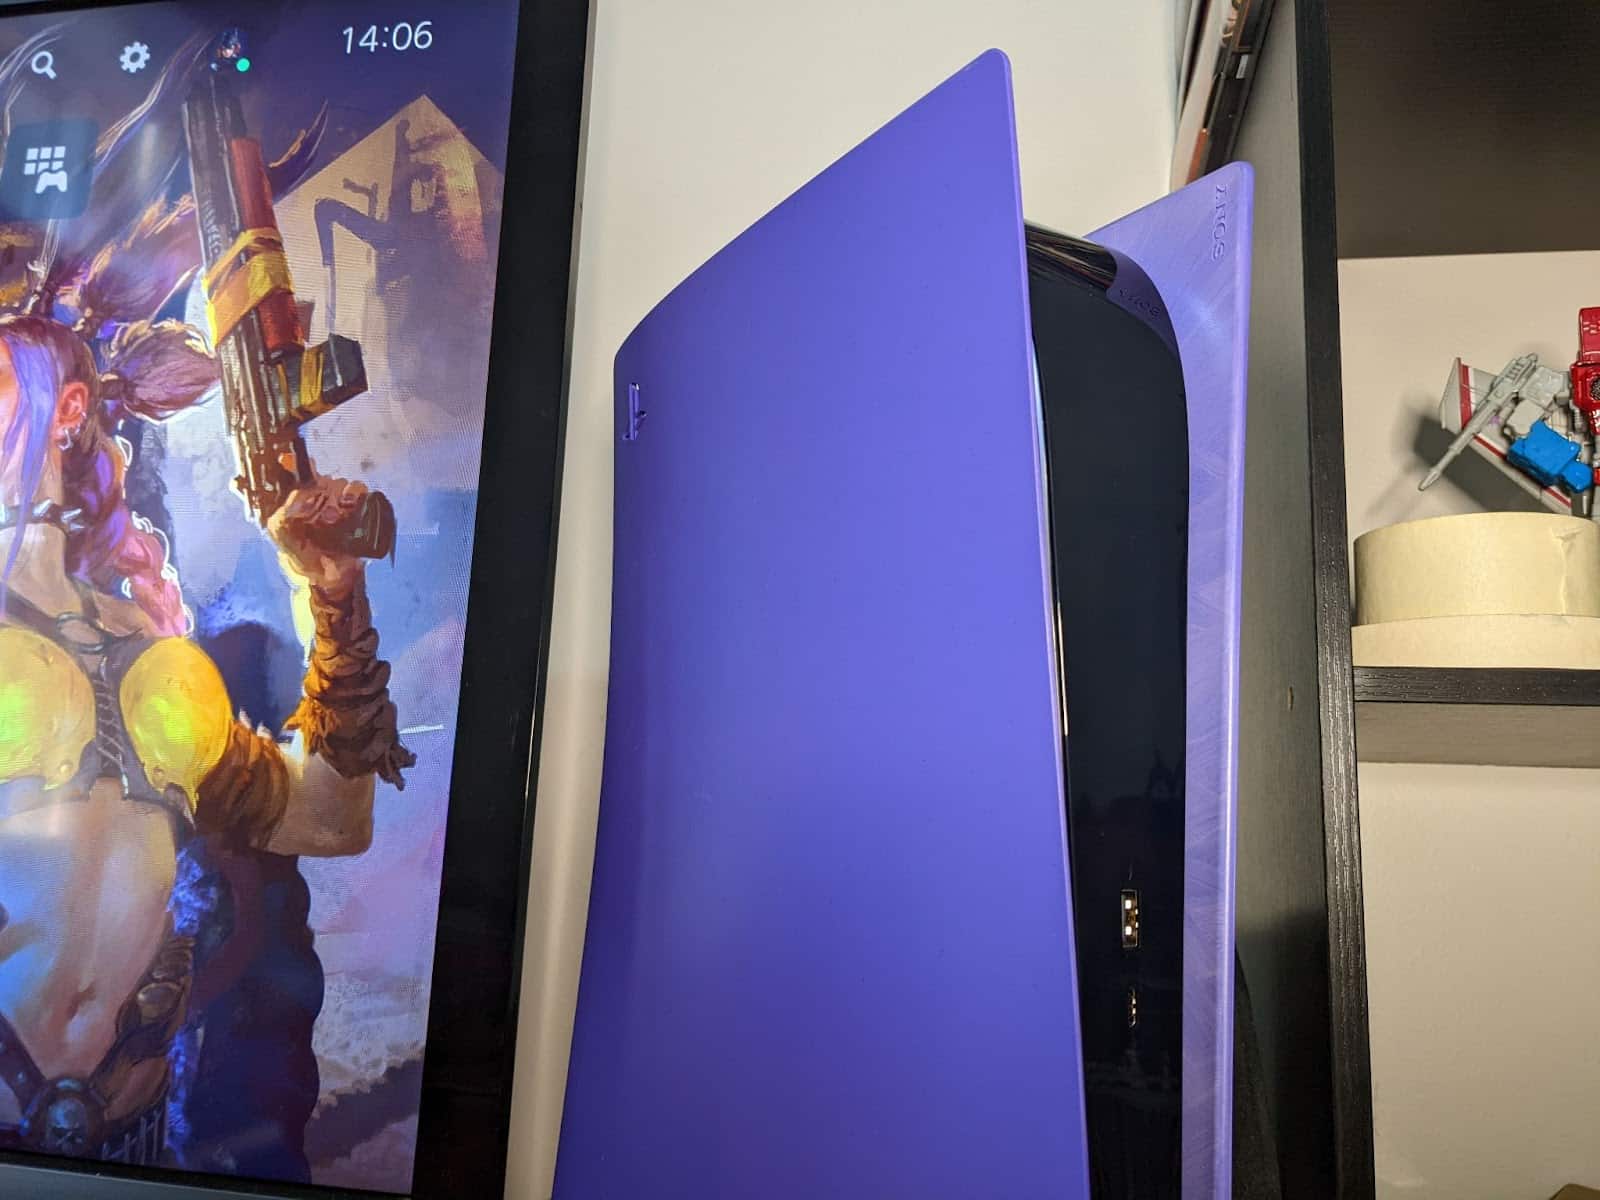
Overall, I’m immensely pleased with the end result, and the whole project was really fun to do. There are a few little imperfections when you look at it up close, but I’m still thrilled with how my gamble turned out.
Even though I personally used expensive, modelling-grade supplies, the whole project came in at a much lower price than the official PlayStation PS5 faceplates. And what’s more, it also gave me that fuzzy feeling of creative accomplishment, which made the whole venture worthwhile.
If you’ve been thinking about customising your PS5 faceplates yourself, I say go for it! Hopefully my experience takes some of the unknowns out of the process for you. If you do decide to go ahead with your own DIY project, please share the results with us on social media!
We’ve handpicked our latest and most visited guides covering online casinos, betting sites, and more—for every kind of player.
Jam Walker is a games and entertainment journalist from Melbourne, Australia. They hold a bachelor's degree in game design from RMIT but probably should have gotten a journalism one instead. You can find them talking entirely too much about wrestling on Twitter <a href="https://x.com/Jamwa">@Jamwa</a>
The Steam Controller launched last month to higher demand than Valve anticipated, prompting a switch to a reservation queue system shortly after launch. Valve says the queue has helped on…