


Star Wars Jedi: Survivor is a game that digs its hooks in early, thanks to a wildly compelling narrative driving all the action and high-stakes drama – but while the game is fairly linear, there are plenty of secrets to find hiding off the beaten path. You can easily smash through the game’s main quests without seeing everything it has to offer, and that would be a fair pursuit.
But if you’re looking for a better, more well-rounded experience, jam-packed with solid side quests, rigorous challenges, slick combat encounters, and plenty of opportunities to learn more about the world of Star Wars, read on. Before you begin your quest, here’s what we recommend for the best Star Wars Jedi: Survivor experience.
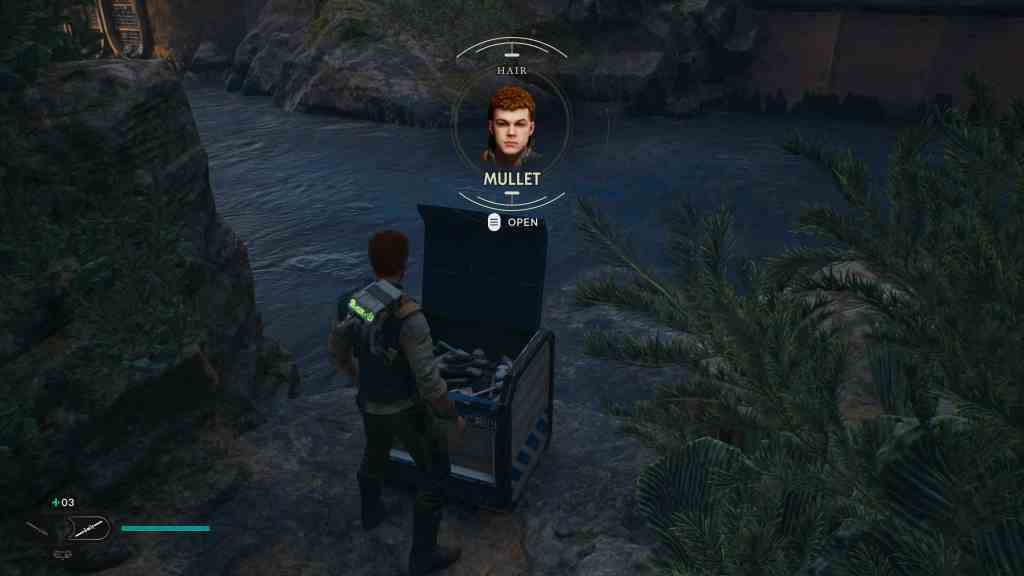
In your quest through Star Wars Jedi: Survivor, you’ll often find blue crates littered around the scenery. These can be in hard-to-reach and hard-to-find places, and tempt you to go off the beaten path.
While you can certainly pursue the goal of finding every blue crate on each planet, don’t worry too much about collecting them all – they only contain cosmetic items like new clothing, hairstyles, lightsaber colours, hilts, and BD-1 paints.
Read: How to unlock the mullet in Star Wars Jedi: Survivor
You’ll largely want to pursue health crates (usually on the beaten path) and hidden Force crystals (marked by a glow) to improve tangible stats and abilities in the game instead. Many of these crates are also more easily discovered in the late game, once you earn additional traversal abilities, so you can safely leave their collection until the end of your adventure.
In Star Wars Jedi: Survivor, you can adopt a range of lightsaber stances (five in total) that change how Cal Kestis approaches enemies in combat. You’ll want to find your favourite stance early, however, and begin working on levelling up its abilities ASAP.
There’s no major incentive to constantly swap between combat stances, beyond a discoverable perk unlocking greater damage if you do so, and some scattered combat challenges. So, you can basically pick your stance, and dump all your skill points in it for an immediate advantage in battles.
Read: Star Wars Jedi: Survivor review – One with the Force
We went with the ballerina-like Double-bladed stance as our favourite, because of the freedom of movement it offers, and the unlockable dash attack that easily destroys enemy defences – but you should experiment to find your preference.
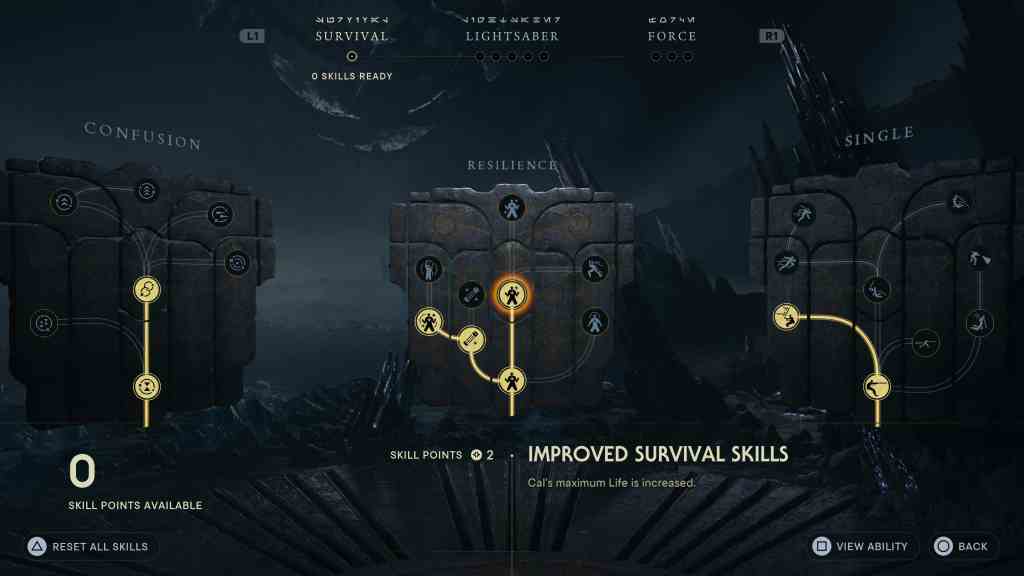
There are three main skill trees in Star Wars Jedi: Survivor – Survival, Lightsaber, and Force. When you begin your journey, you should focus solely on bumping up Cal’s Survival skills and specifically, improvements to his health meter. The enemies in Jedi: Survivor hit hard, so making sure you can weather at least a few attacks is important.
After you’ve improved Cal’s health, turn your focus to your chosen lightsaber stance, and begin nabbing abilities along the main Lightsaber branch. Once you’re happy with your new combat skills, you should turn your focus to improvements in other areas – like Jedi mind control and telekinesis.
Throughout your adventures in Star Wars Jedi: Survivor, you’ll bring the adorable droid BD-1 with you – and as you explore, he’ll make noises indicating hidden secrets in the world around you. This tip is simple: listen to BD-1, and follow him around as he jumps off your shoulder and explores.
Occasionally, he’ll lead you to new collectibles, and pathways you may not otherwise spot.
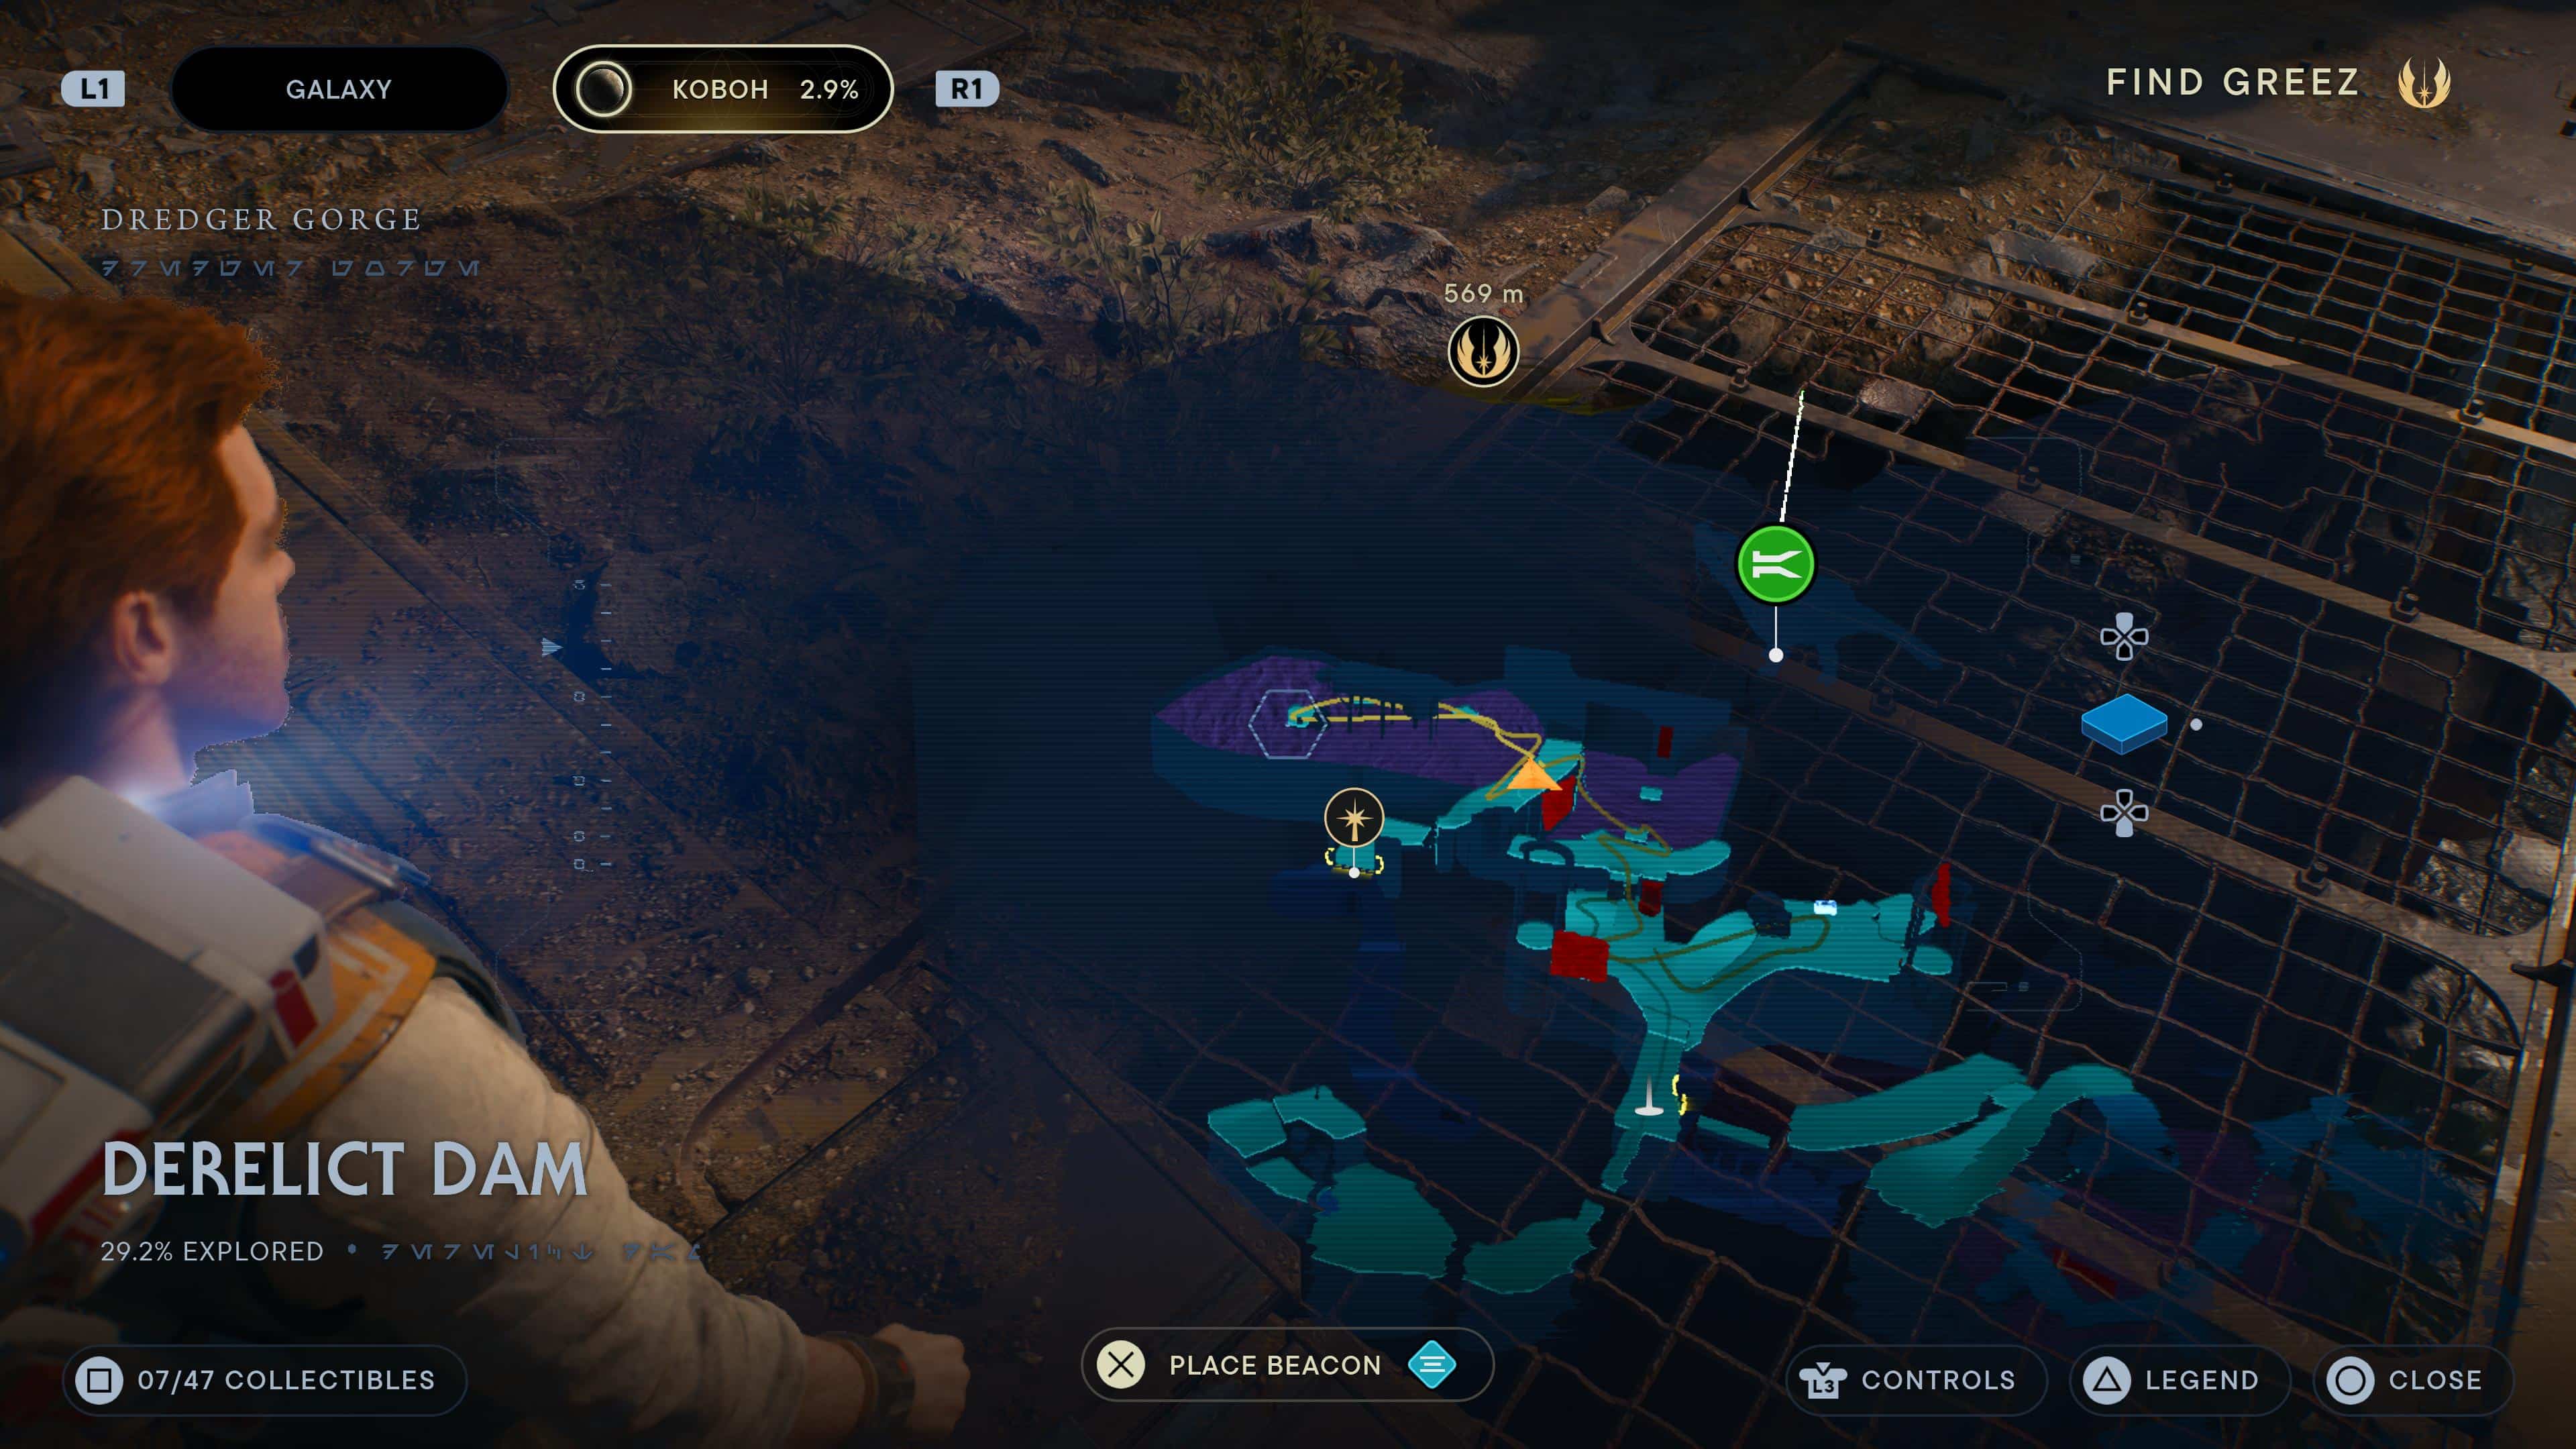
Star Wars Jedi: Survivor, much like its predecessor, can get confusing in places. Maps are fairly logical, but you can get stuck in certain areas – particularly those blocked off by a traversal ability you’ve yet to unlock. The moment you find yourself circling with no clue about direction, or how to solve a particular puzzle, you should check the map.
Usually, spinning the screen around and searching your location will reveal a hidden pathway, like a crack to slip through, or a door to unlock. If you’d like to avoid wasting time and frustration, you’ll want to constantly check your map.
Note that sometimes, you will have to abandon your current path and backtrack to certain areas later.
Each time you die in Star Wars Jedi: Survivor, you’ll leave behind a Force Echo that contains the XP you earned prior to your death, and a full dosage of health. While these Echoes usually land in difficult places – in boss dens, most commonly – it’s important to go back to retrieve them so you don’t lose any progress in building up your abilities.
To find your Echo, all you need to do is search the map for an ‘X’ symbol, return to the area where you last died, and touch the Echo. You’ll get an instant health boost, and restore your gathered experience points.

A few hours into Star Wars Jedi: Survivor, you’ll meet bounty hunter Caij, an Aussie-accented Nautolan, who provides you with a string of bounty hunters to defeat. While you can easily ignore this quest line, you really, really shouldn’t. On top of providing an extra bit of challenge, it also reveals a brilliant cutscene upon its conclusion.
We won’t spoil its nature, but it’s worth the rigamarole of hunting down each and every enemy.
To kick off these bounty hunts, you’ll need to head to Greez’s bar in Rambler’s Reach, and find Caij sitting in a booth on the far left side of the venue. She’ll hand out each bounty one at a time, so you’ll want to scatter these quests throughout your playthrough for efficiency.
As mentioned, you may occasionally run into a brick wall in Star Wars Jedi: Survivor, thanks to the game’s incrementally-available traversal abilities. If you spot a floating orange gondola, obsidian crystals, a green laser wall, or an otherwise unreachable surface, know that you’ll have to turn around.
Eventually, Cal and BD-1 will unlock the tools to overcome these challenges, allowing you to backtrack and revisit certain, previously-inaccessible places. If you’re looking to level up and gain more experience points, make sure you do this. These areas tend to contain special Force crystals, unique bosses, new NPCs, collectibles, and a greater array of challenges.
Once you’ve gained a new traversal ability, turn back on your path and revisit all your previous dead ends. That way, you’ll discover the best of what Star Wars Jedi: Survivor has to offer.
Star Wars Jedi: Survivor launches for PlayStation 5, Xbox Series X/S, and Windows PC on 28 April 2023.
[lasso id=”10″ link_id=”42811″ type=”table”]
GamesHub has affiliate partnerships. These do not influence editorial content. GamesHub may earn a small percentage of commission for products purchased via affiliate links.

Leah is an experienced entertainment and gaming journalist. With industry-leading knowledge at producing features, social, written and video content about video games and the entertainment sectors.